Category: Snacks
-
Chocolate Chip Cookie Molten Cakes for Two
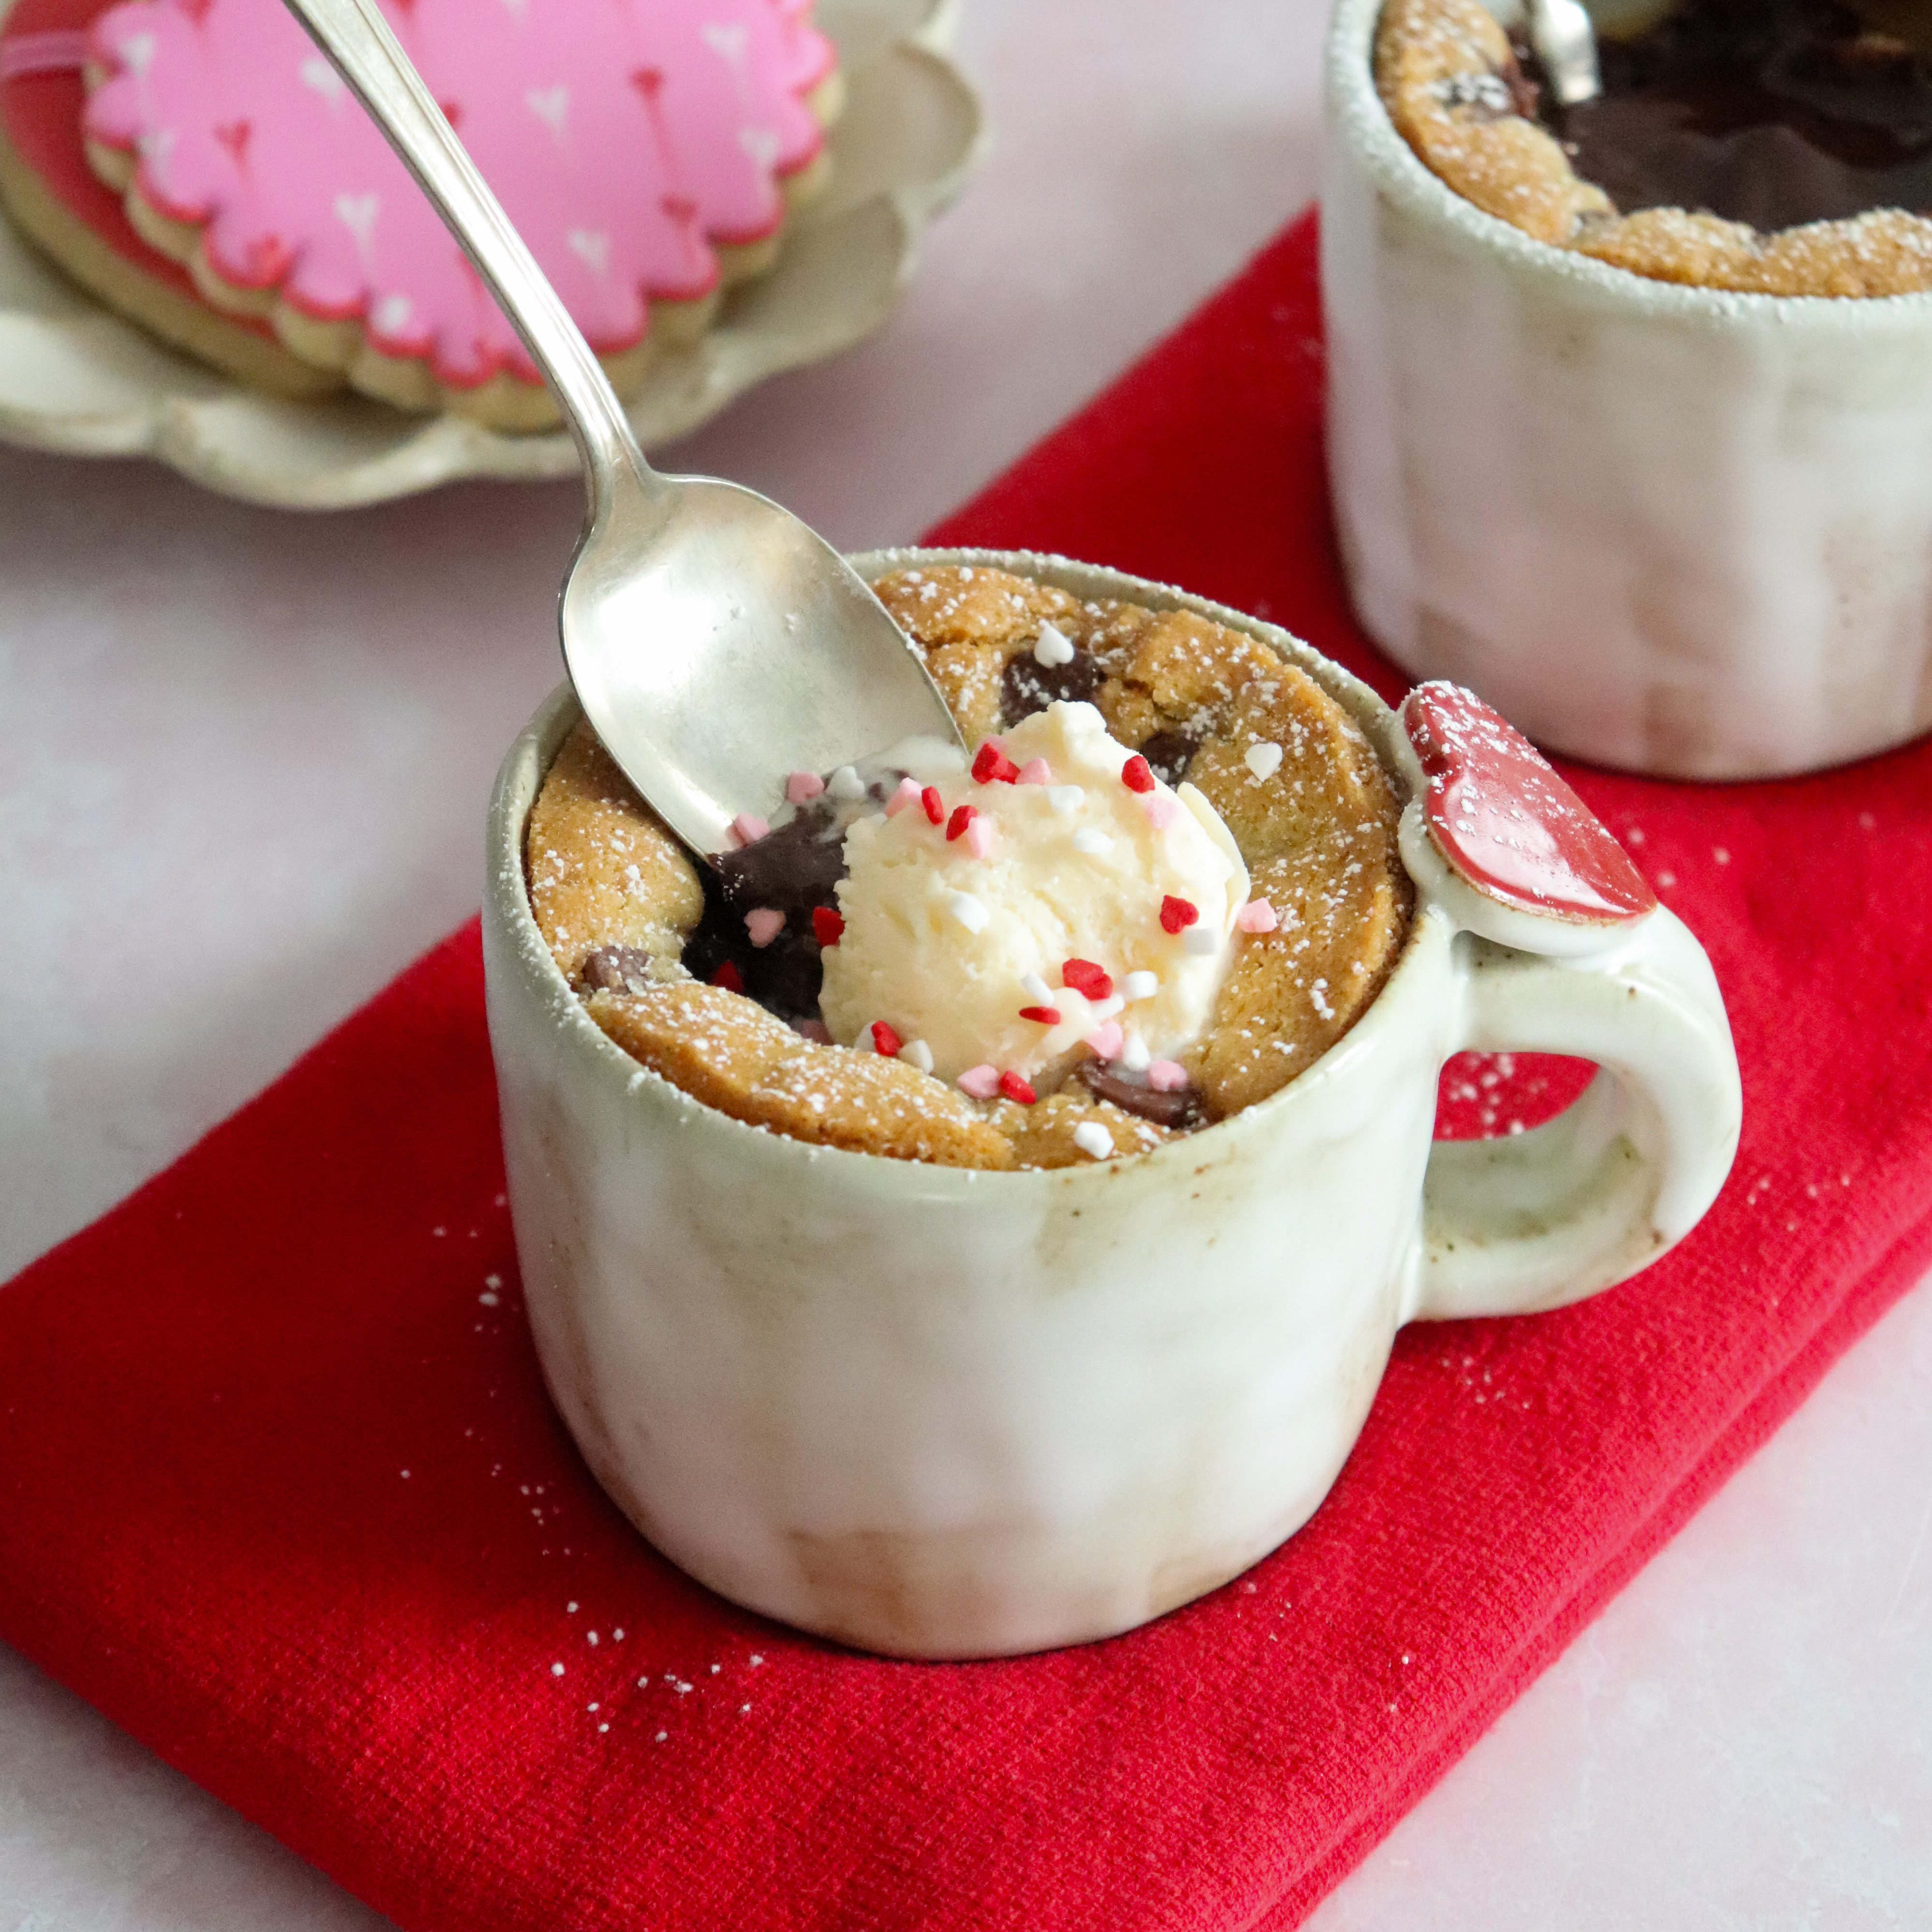
Chocolate Chip Cookie Molten Cakes for Two Craving a warm, gooey dessert that’s both impressive and incredibly easy to make? Look no further! These Chocolate Chip Cookie Molten Cakes, with a rich chocolate ganache center, are the perfect treat to share (or not!) on a cozy night in. They combine the comforting familiarity of chocolate…
-
Delicious Oatmeal Chocolate Chip Breakfast Cookies
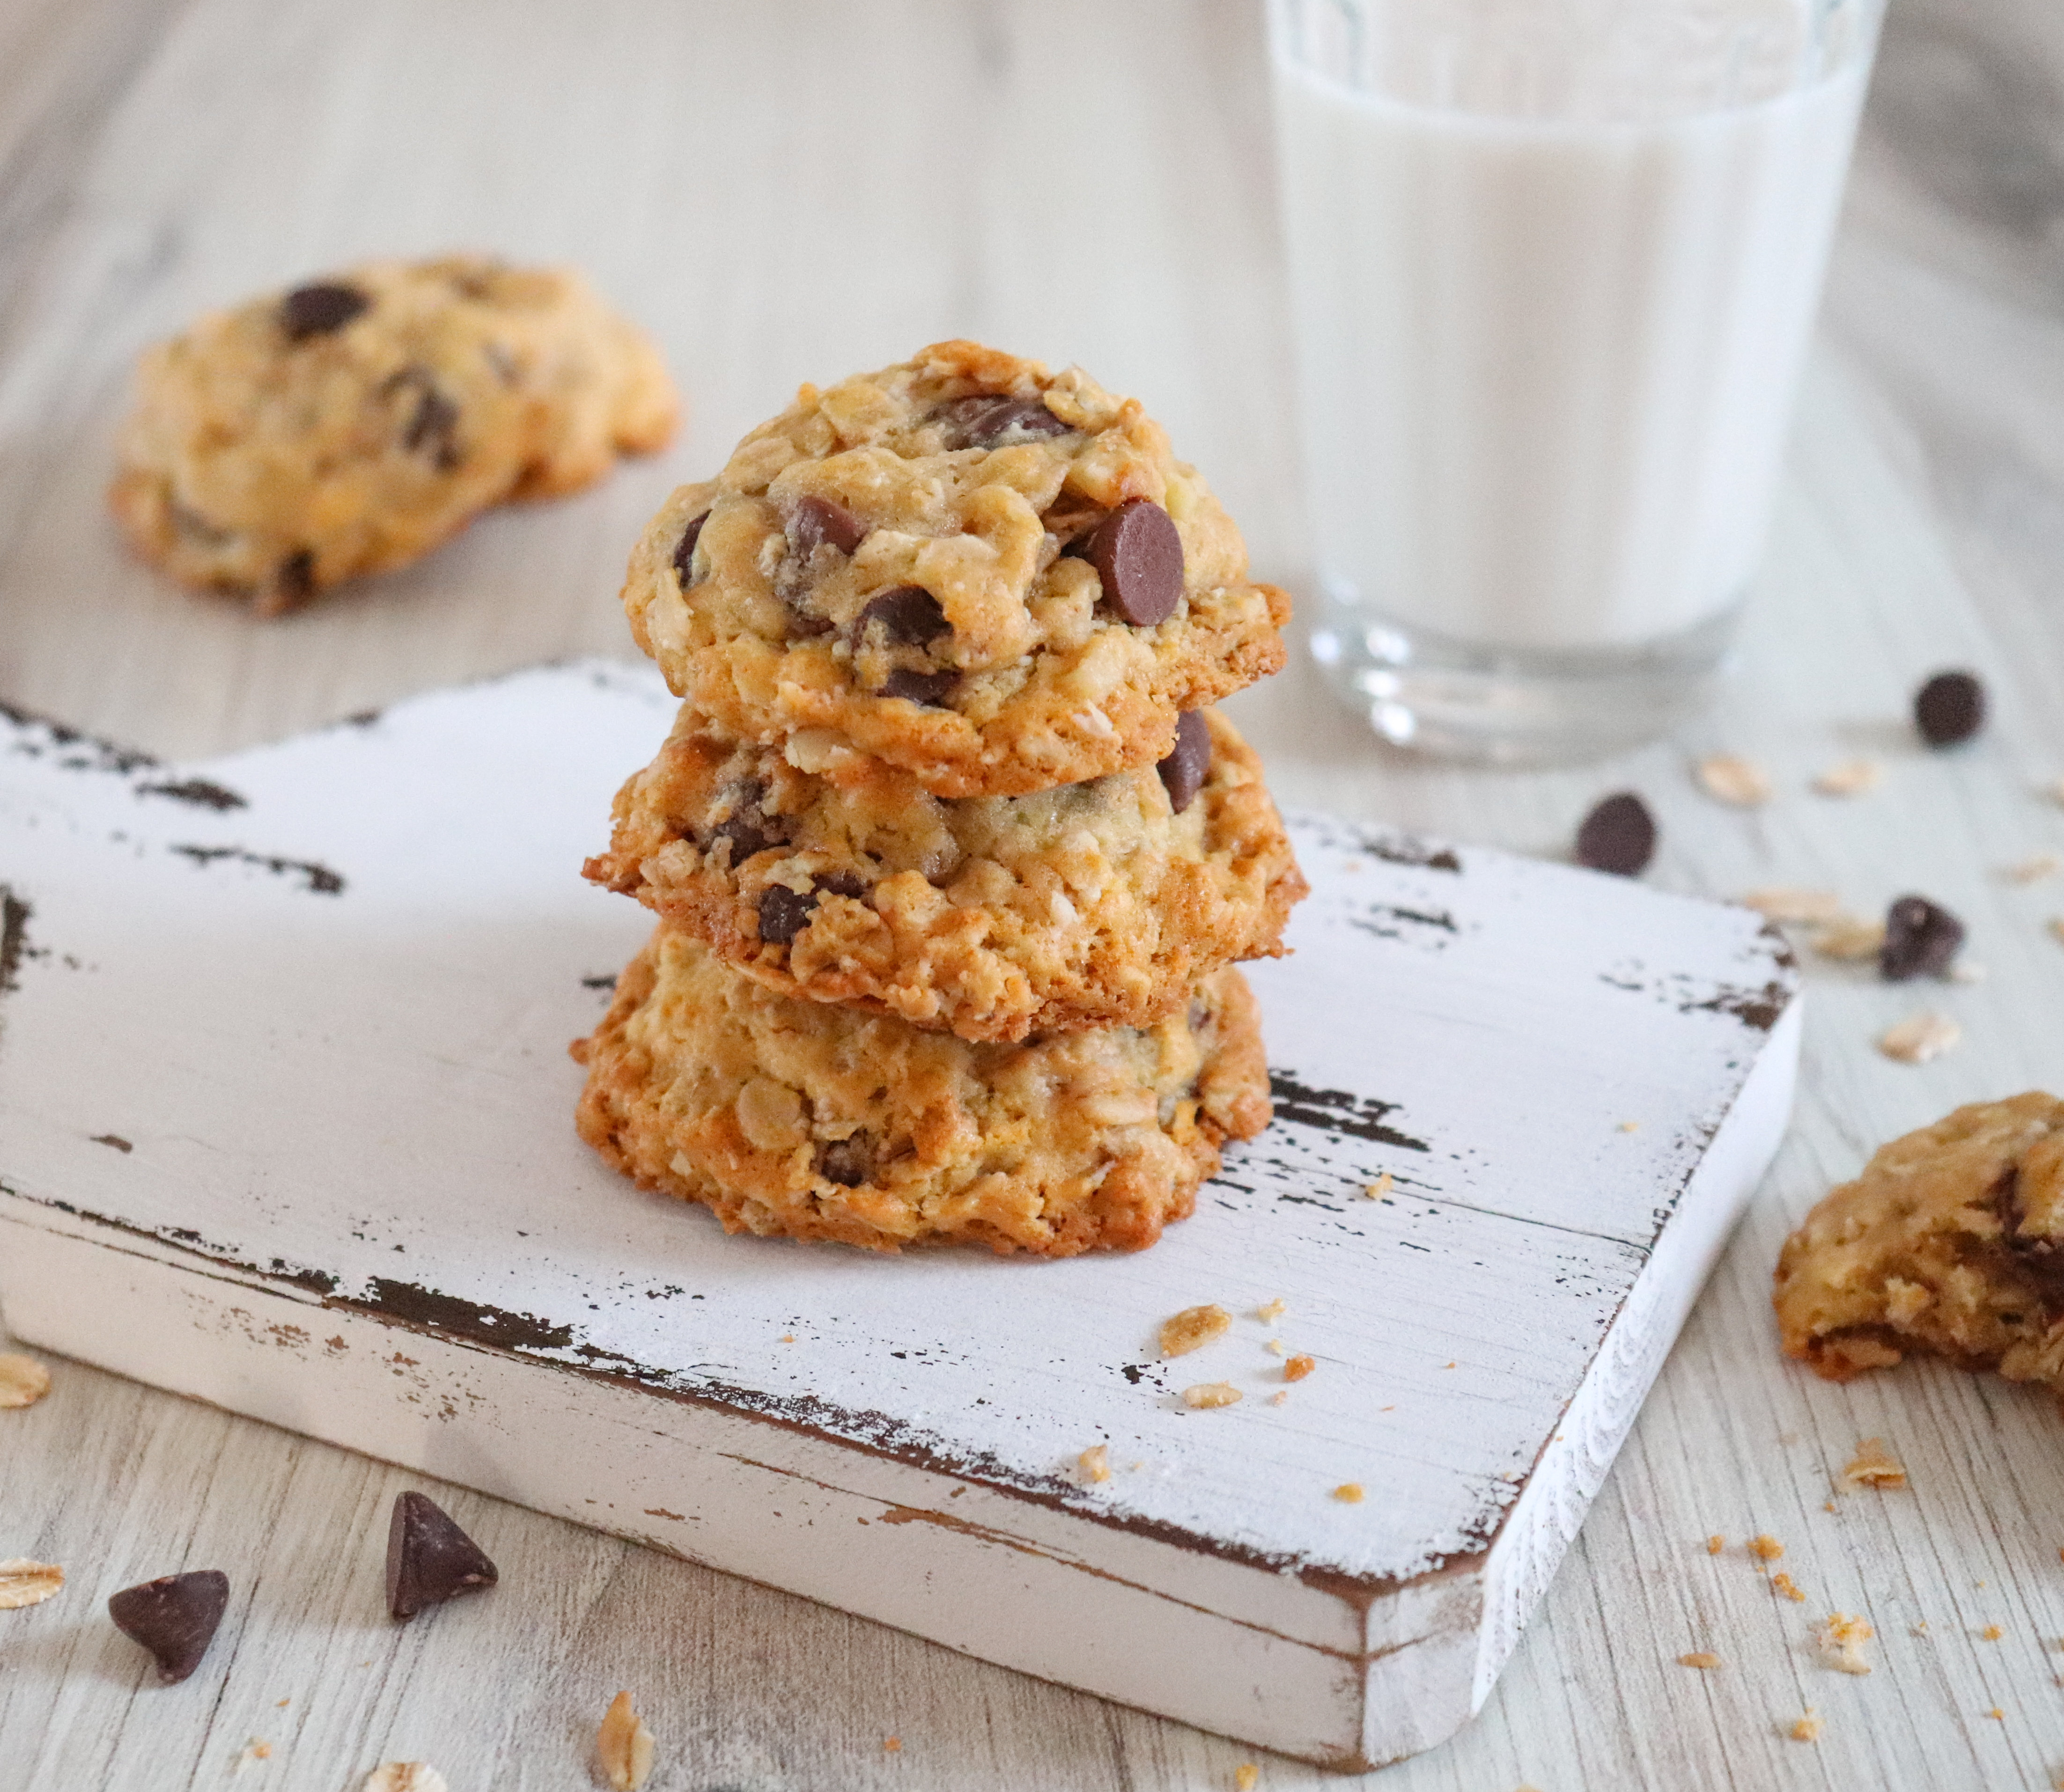
Breakfast cookies are a fantastic solution for busy mornings. They combine the satisfying chew of oatmeal with the sweetness of chocolate chips, providing a balance of fiber, protein, and healthy fats. Not only are they delicious, but they’re also packed with nutrients that will keep you energized throughout your day. Plus, they’re super easy to…
-
Homemade Caramel Candy

Chocolate covered caramels sprinkled with salt flakes are one of my daughter Melissa and my daughter-in-love Melissa’s favorite holiday treats. Every time I buy them, I say to myself, “I can make these!”. After researching a lot of recipes and YouTube videos I discovered I had my work cut out for me. Making a delicious…
-
Christmas Movie Charcuterie Board
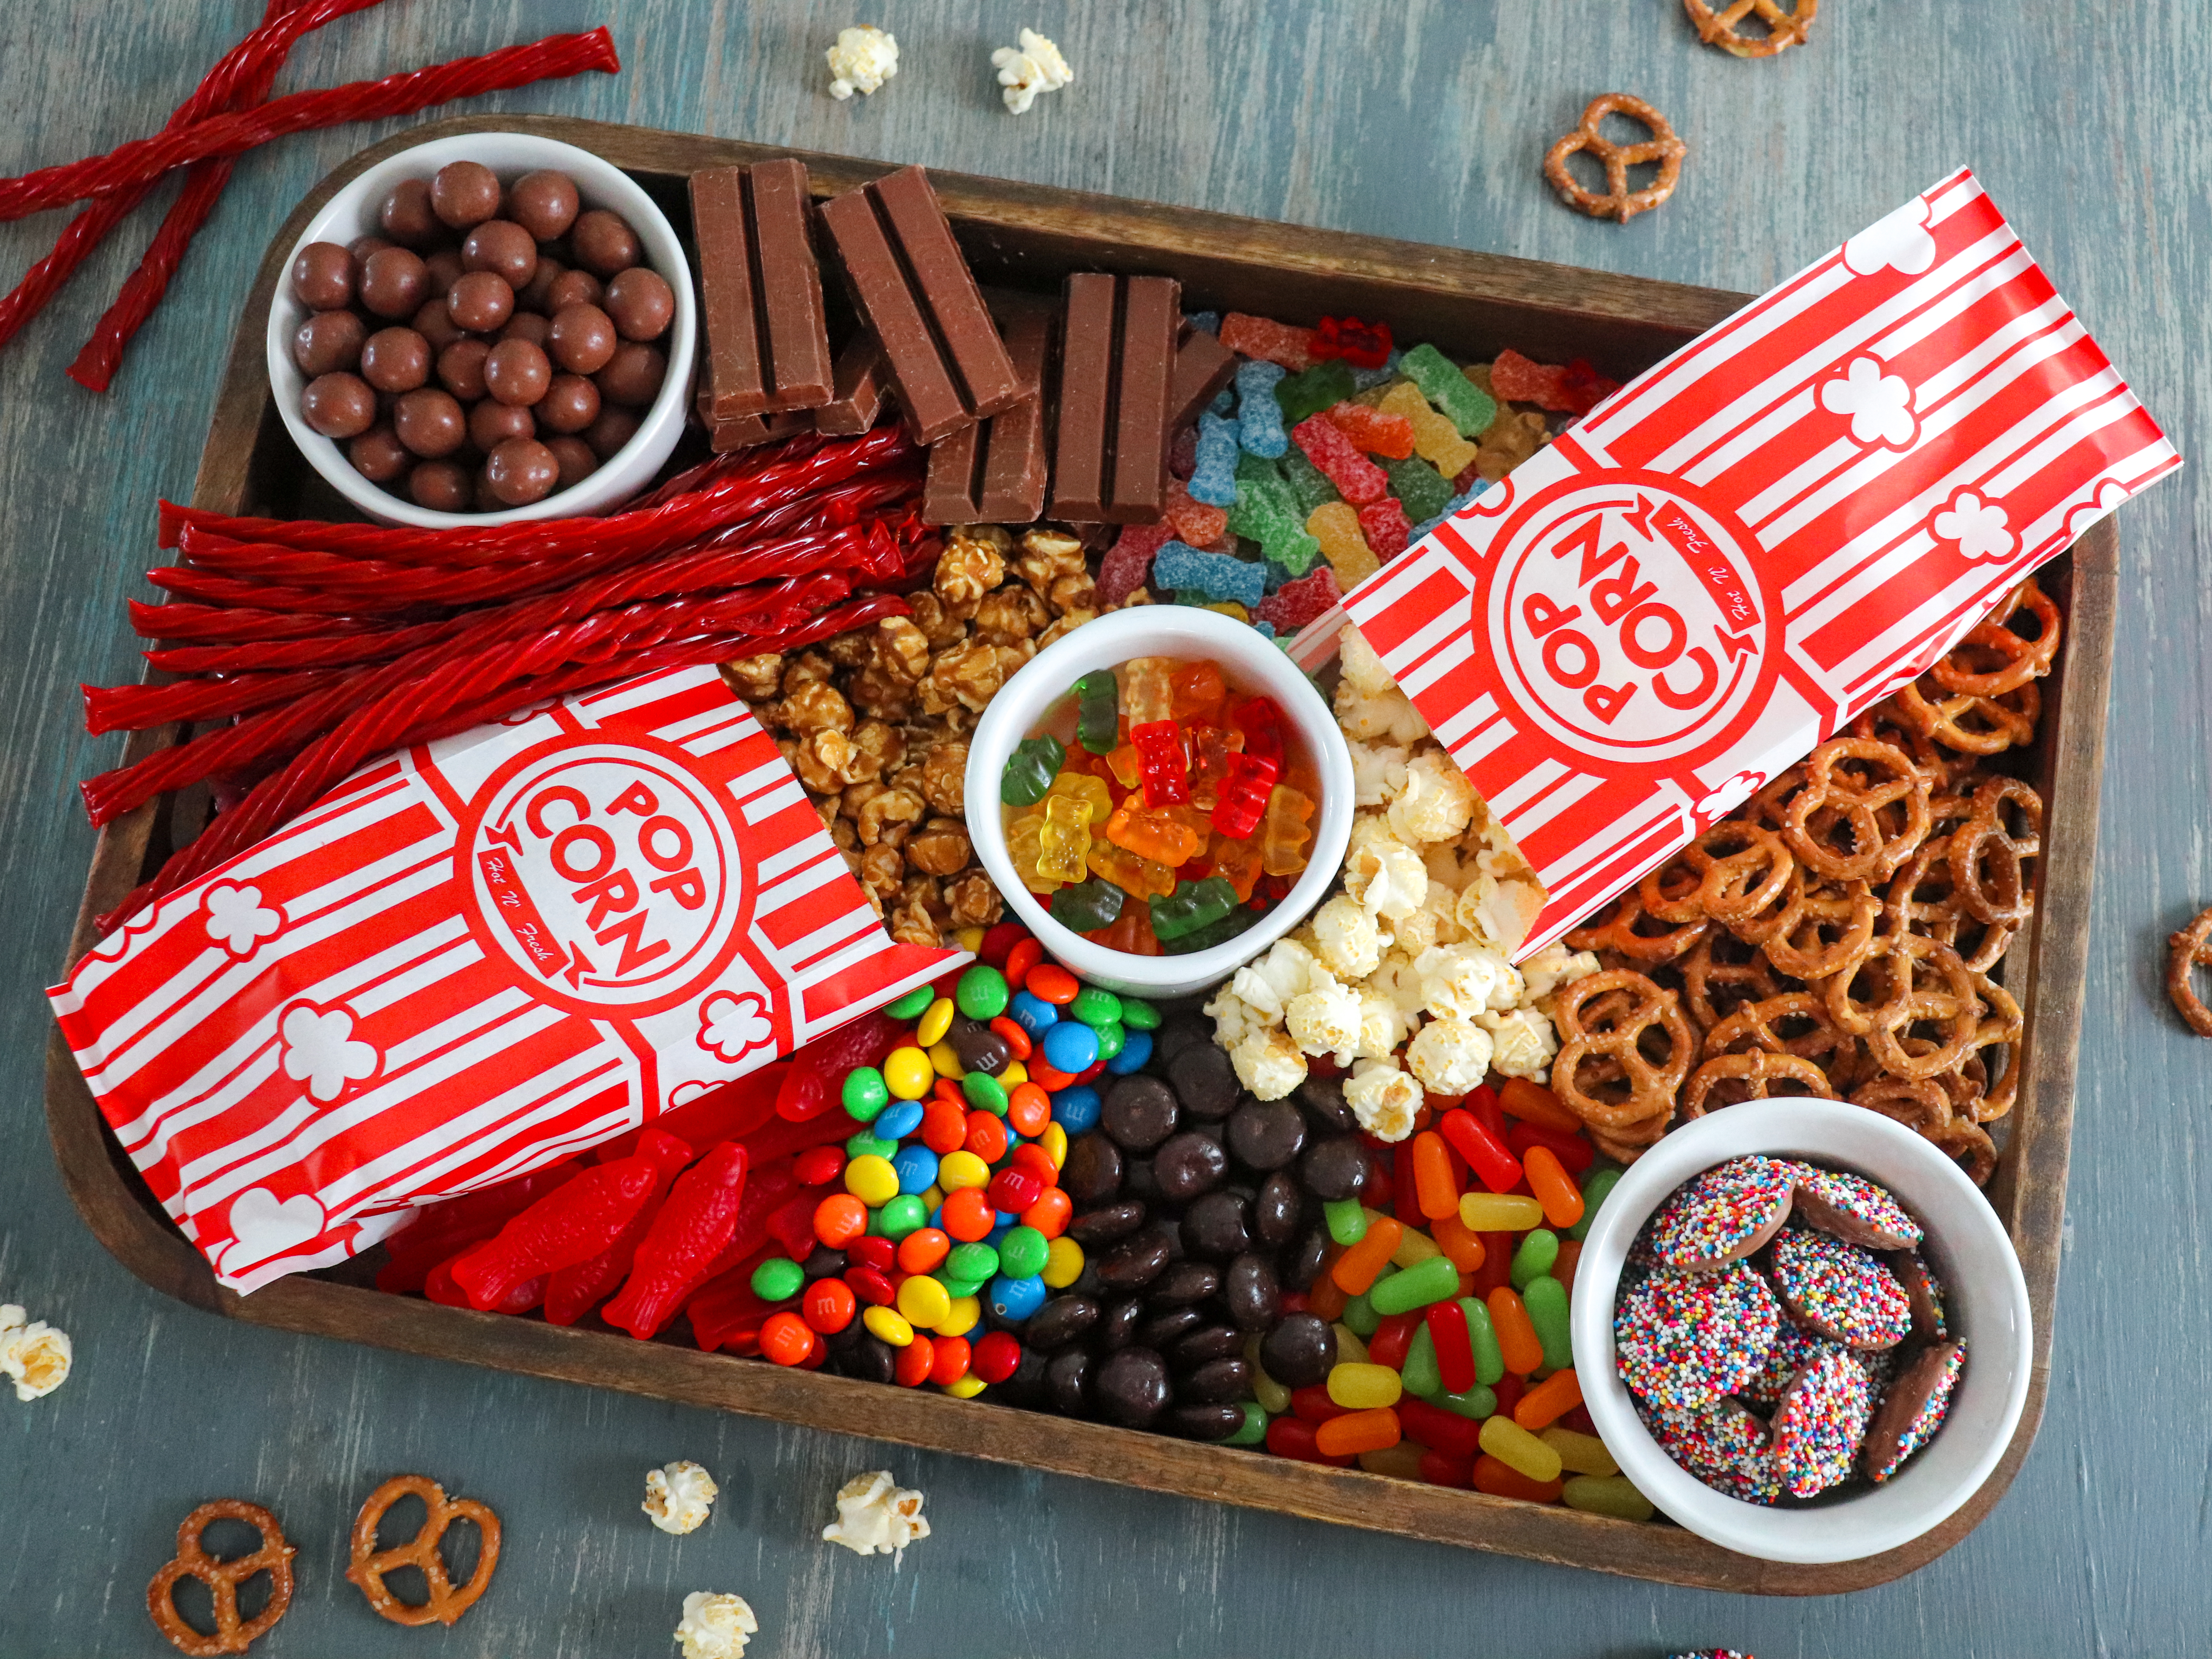
A Festive Christmas Movie Charcuterie Board: Popcorn, Candy, and Holiday Cheer! As the temperatures drop and the holiday season arrives, there’s nothing quite like snuggling up on the couch with loved ones to watch your favorite Christmas movies. But what could make this cozy experience even better? A Christmas movie charcuterie board bursting with sweet…
-
Christmas Mini Egg NYC Cookies
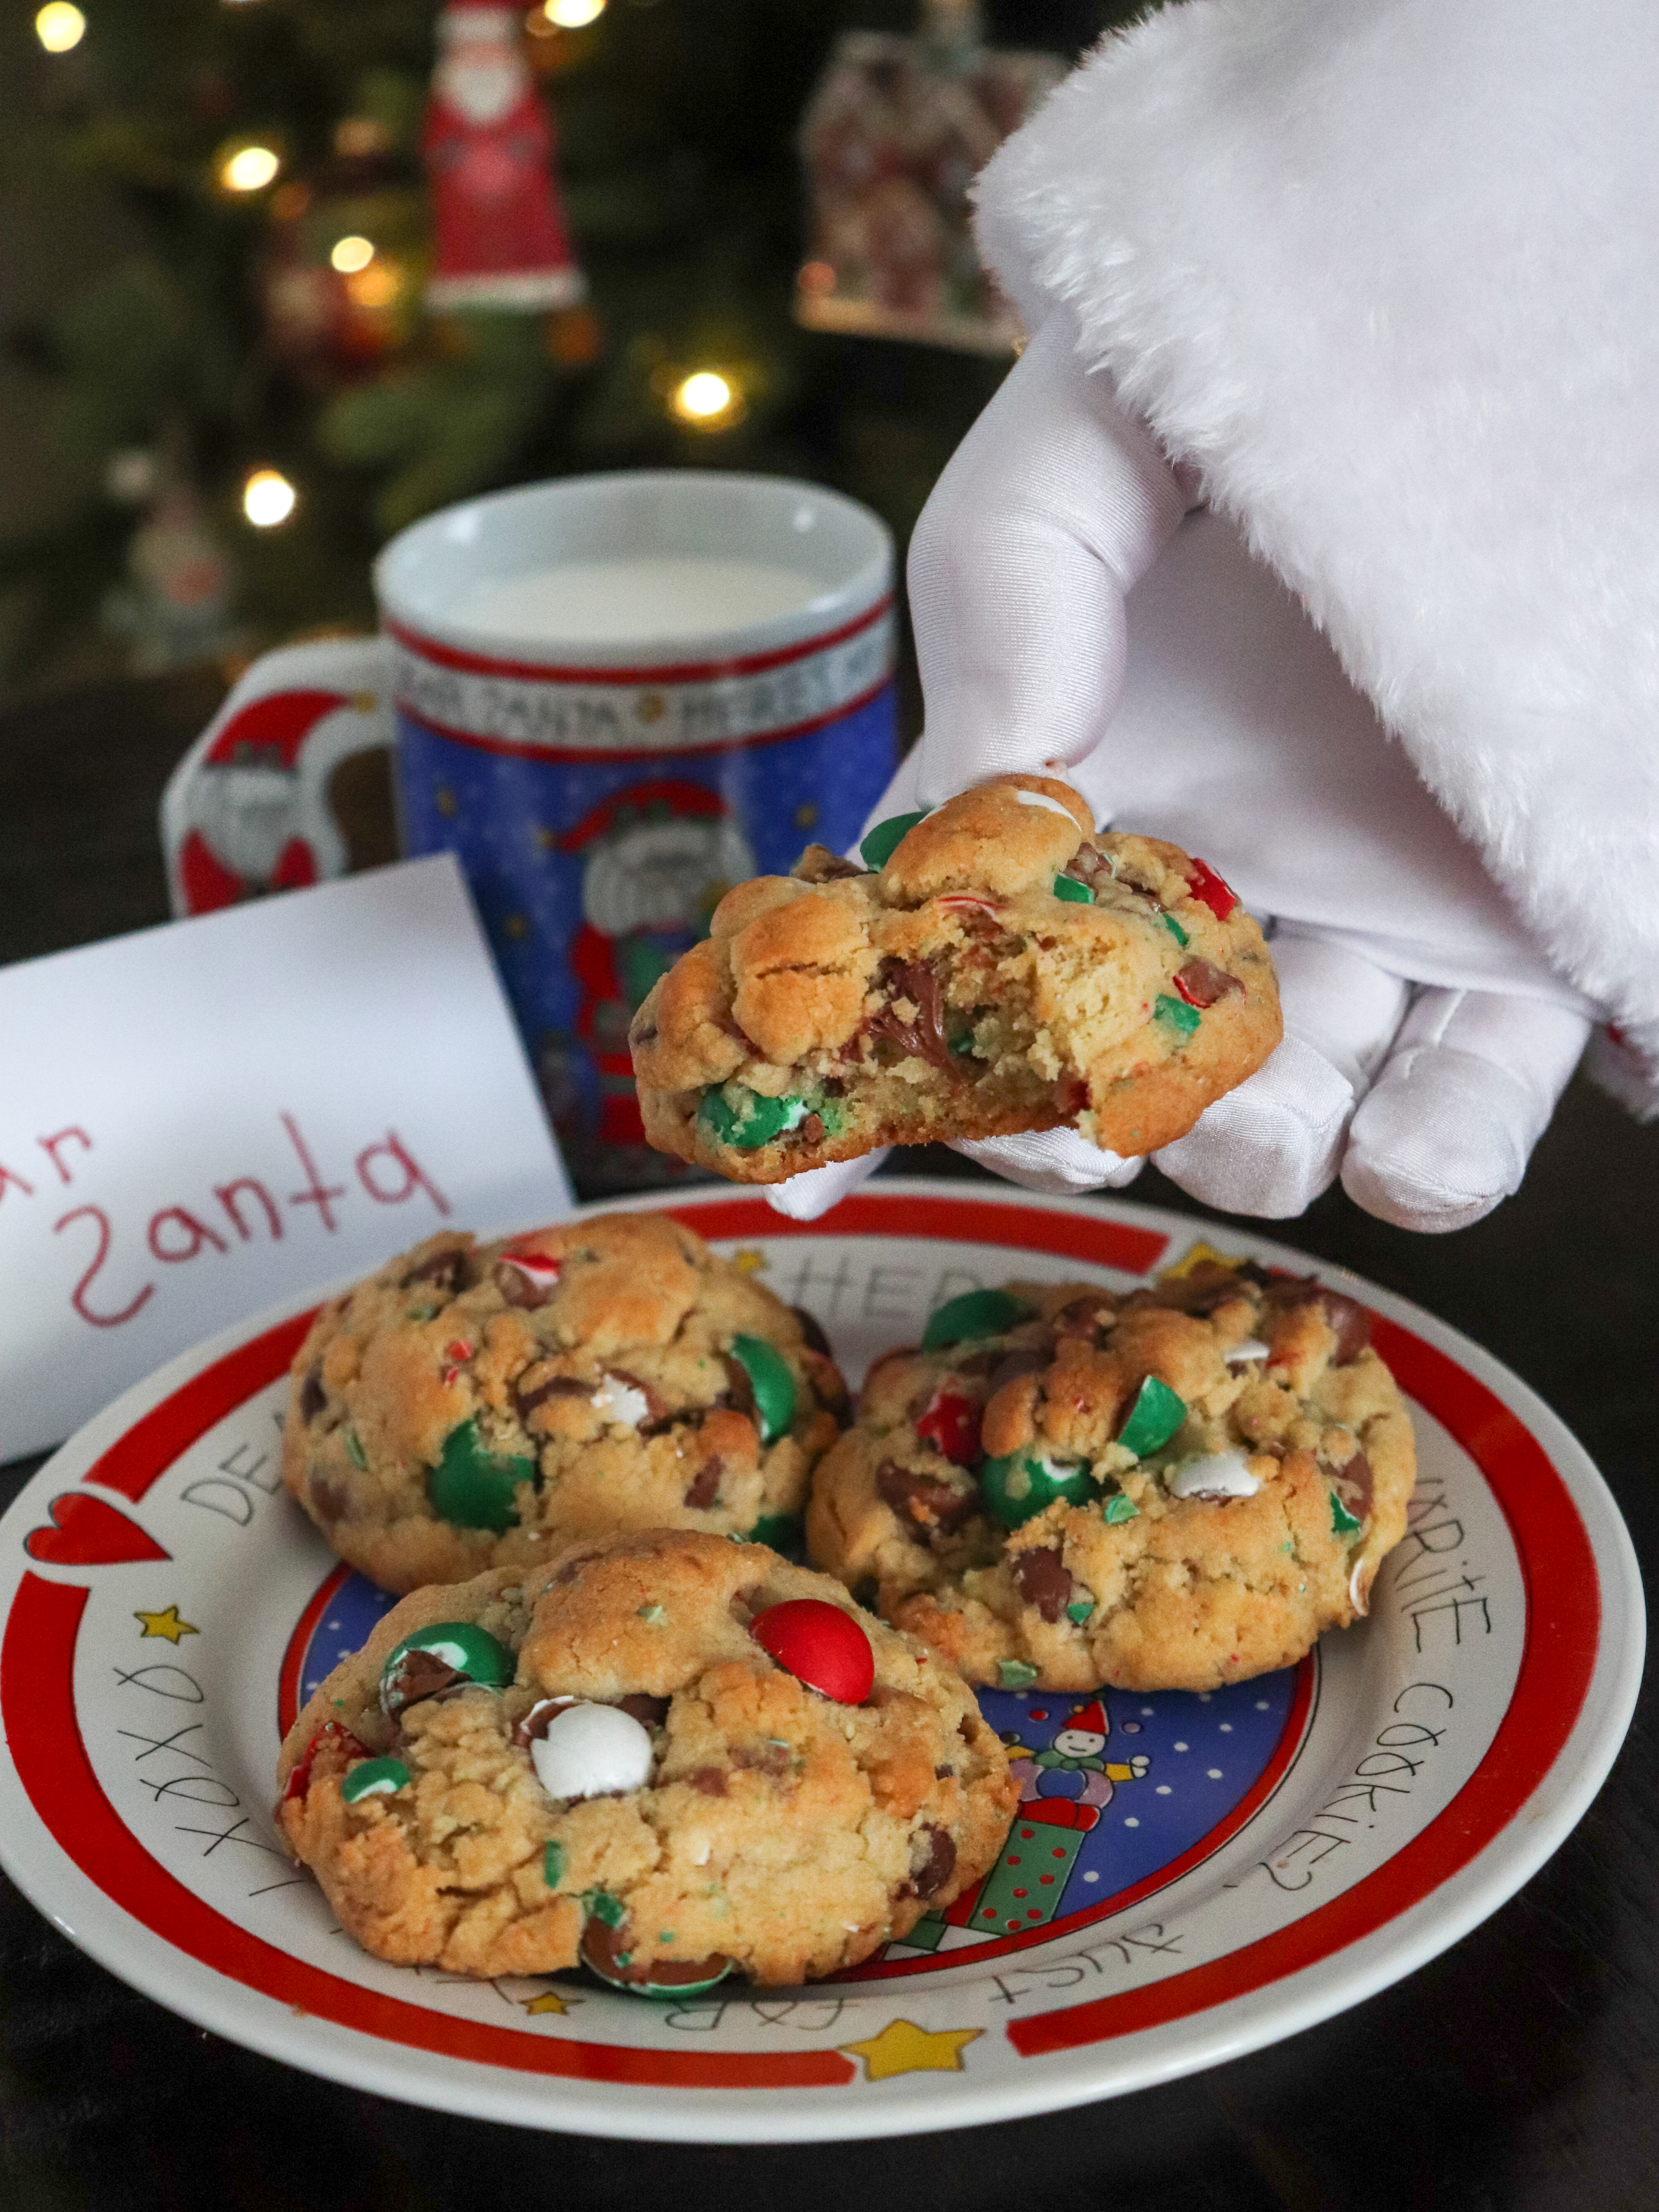
Christmas Mini Egg NYC Cookies: One of Santa’s Favorite Treats! As the holiday season approaches, festive traditions come alive, and nothing embodies the spirit of Christmas quite like baking delicious cookies. Among the myriad of festive treats, one cookie stands out as a favorite of Santa Claus himself: the Christmas Mini Egg NYC Cookie. This…
-
Rolled Gingerbread Cookies
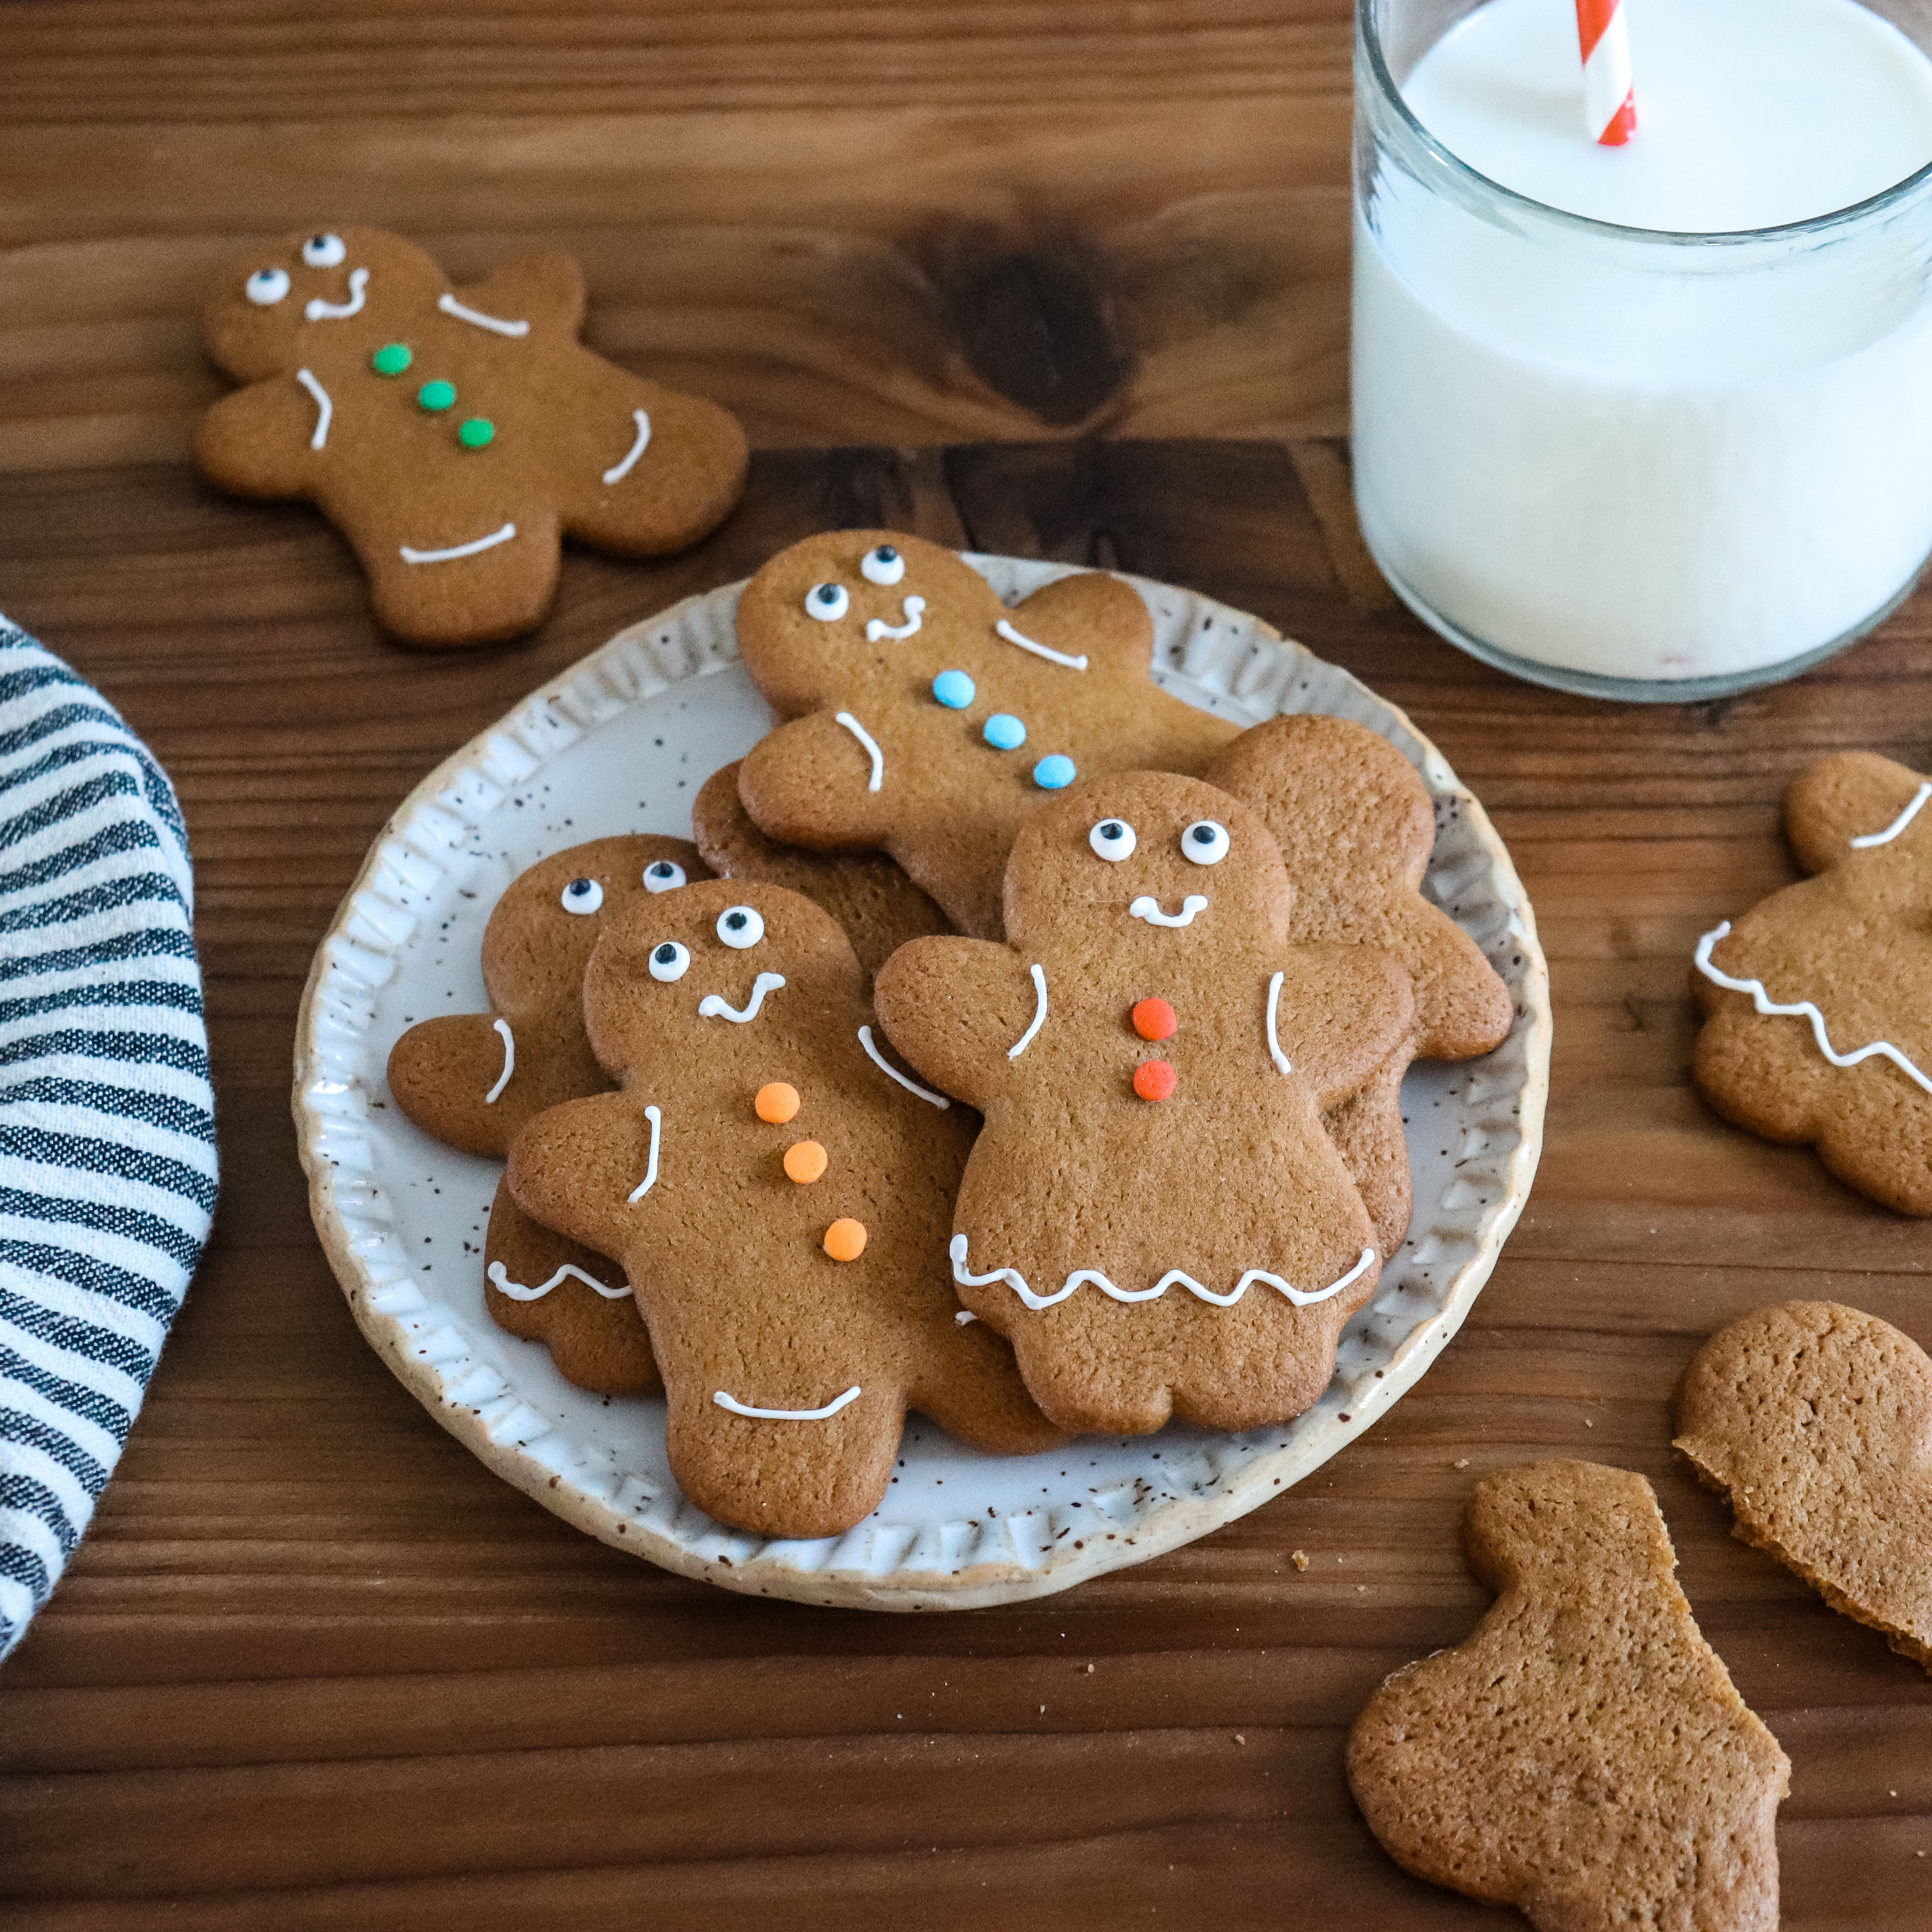
Gingerbread Cookies – Makes about 3 dozen gingerbread people When the holidays approach, it’s time to start thinking about baking delicious treats that not only fill your home with warm scents but also bring joy to those who indulge in them. Rolled gingerbread cookies are a classic choice, with their rich flavors of ginger, cinnamon,…
-
Candy Cane Cookies

These cookies are a whimsical blend of rich buttery dough that evoke memories of childhood holiday celebrations. With their cheerful red and white swirls, they are not only delicious but also a feast for the eyes, making them the highlight of any holiday dessert table. Creating these festive cookies is as joyful as the season…
-
Classic Meringue Cookies
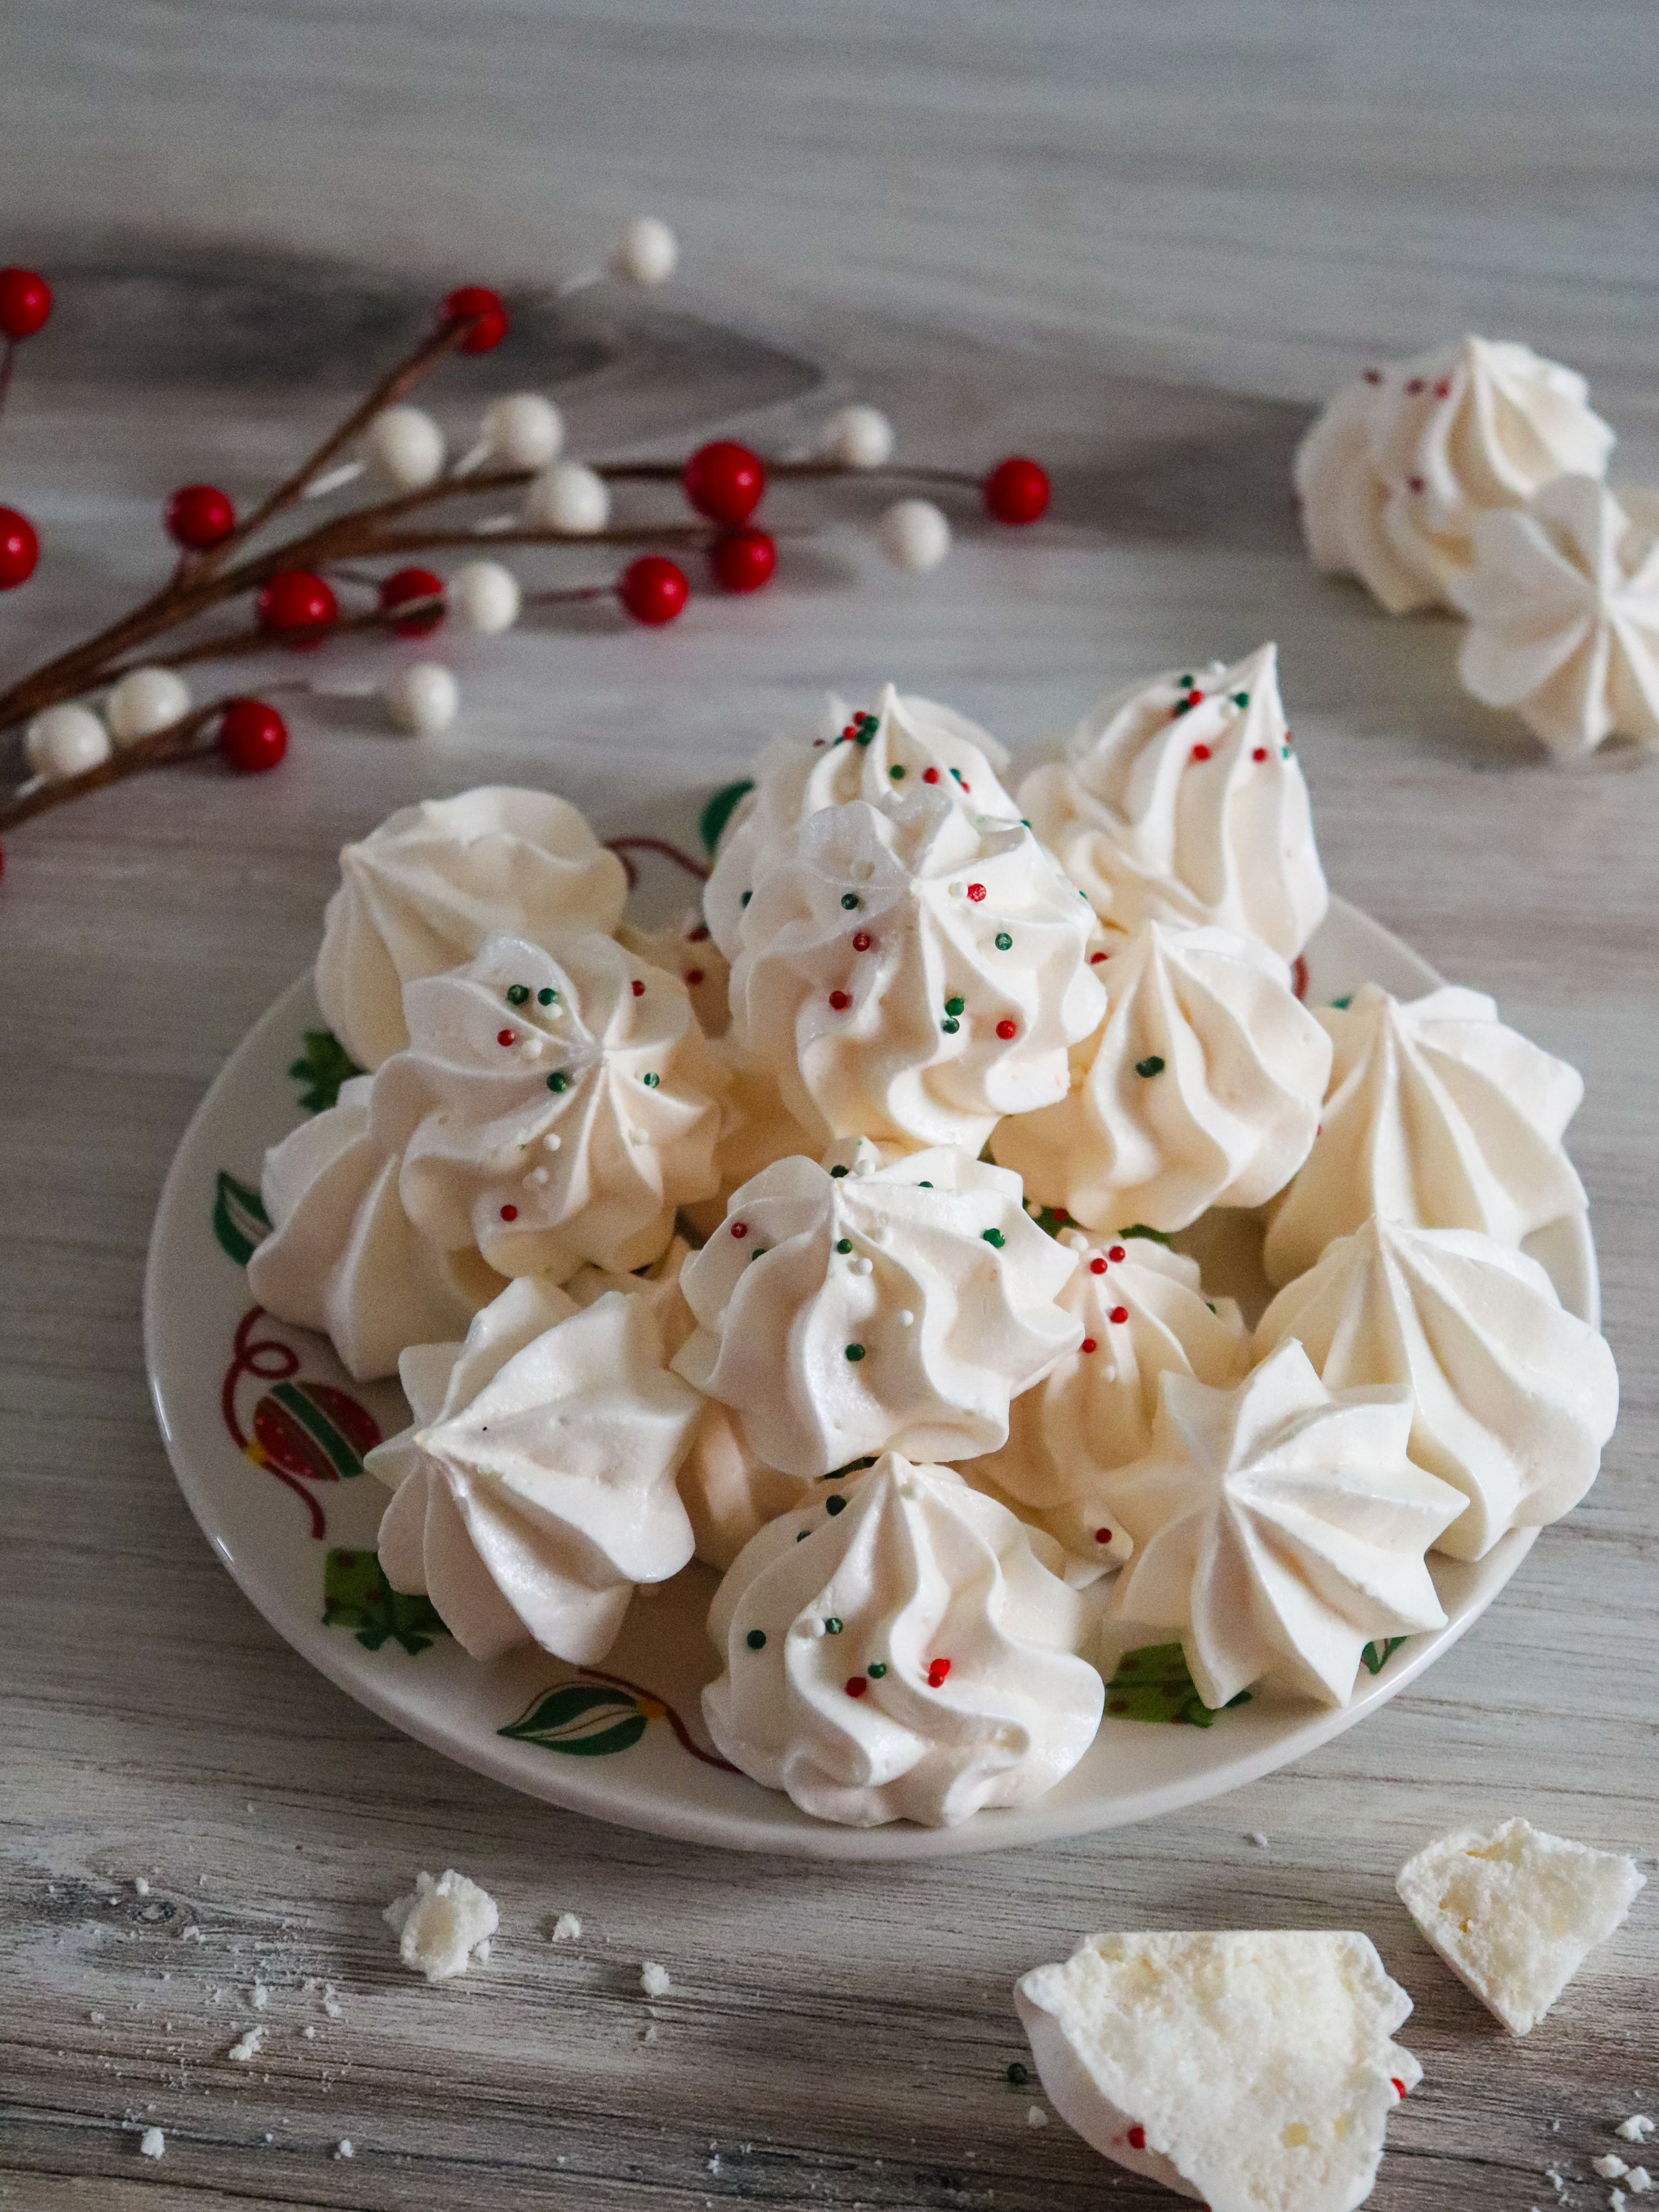
Day 10 of The 12 Days of Christmas Cookies! Meringue cookies are beloved for their delicate texture. Their lightness makes them the ideal accompaniment to afternoon tea or a refreshing dessert after a heavy meal. Plus, they are gluten-free, making them suitable for those with dietary restrictions. With just a few staple ingredients, you can…
-
Rugelach

Day 9 of The 12 Days of Christmas Cookies! Rugelach cookies are a delightful treat that seem to capture the essence of holiday baking, yet their charm and versatility make them perfect for any occasion throughout the year. As I roll out the dough and prepare to fill these little delights, I often find myself…
-
Classic Spritz Cookies
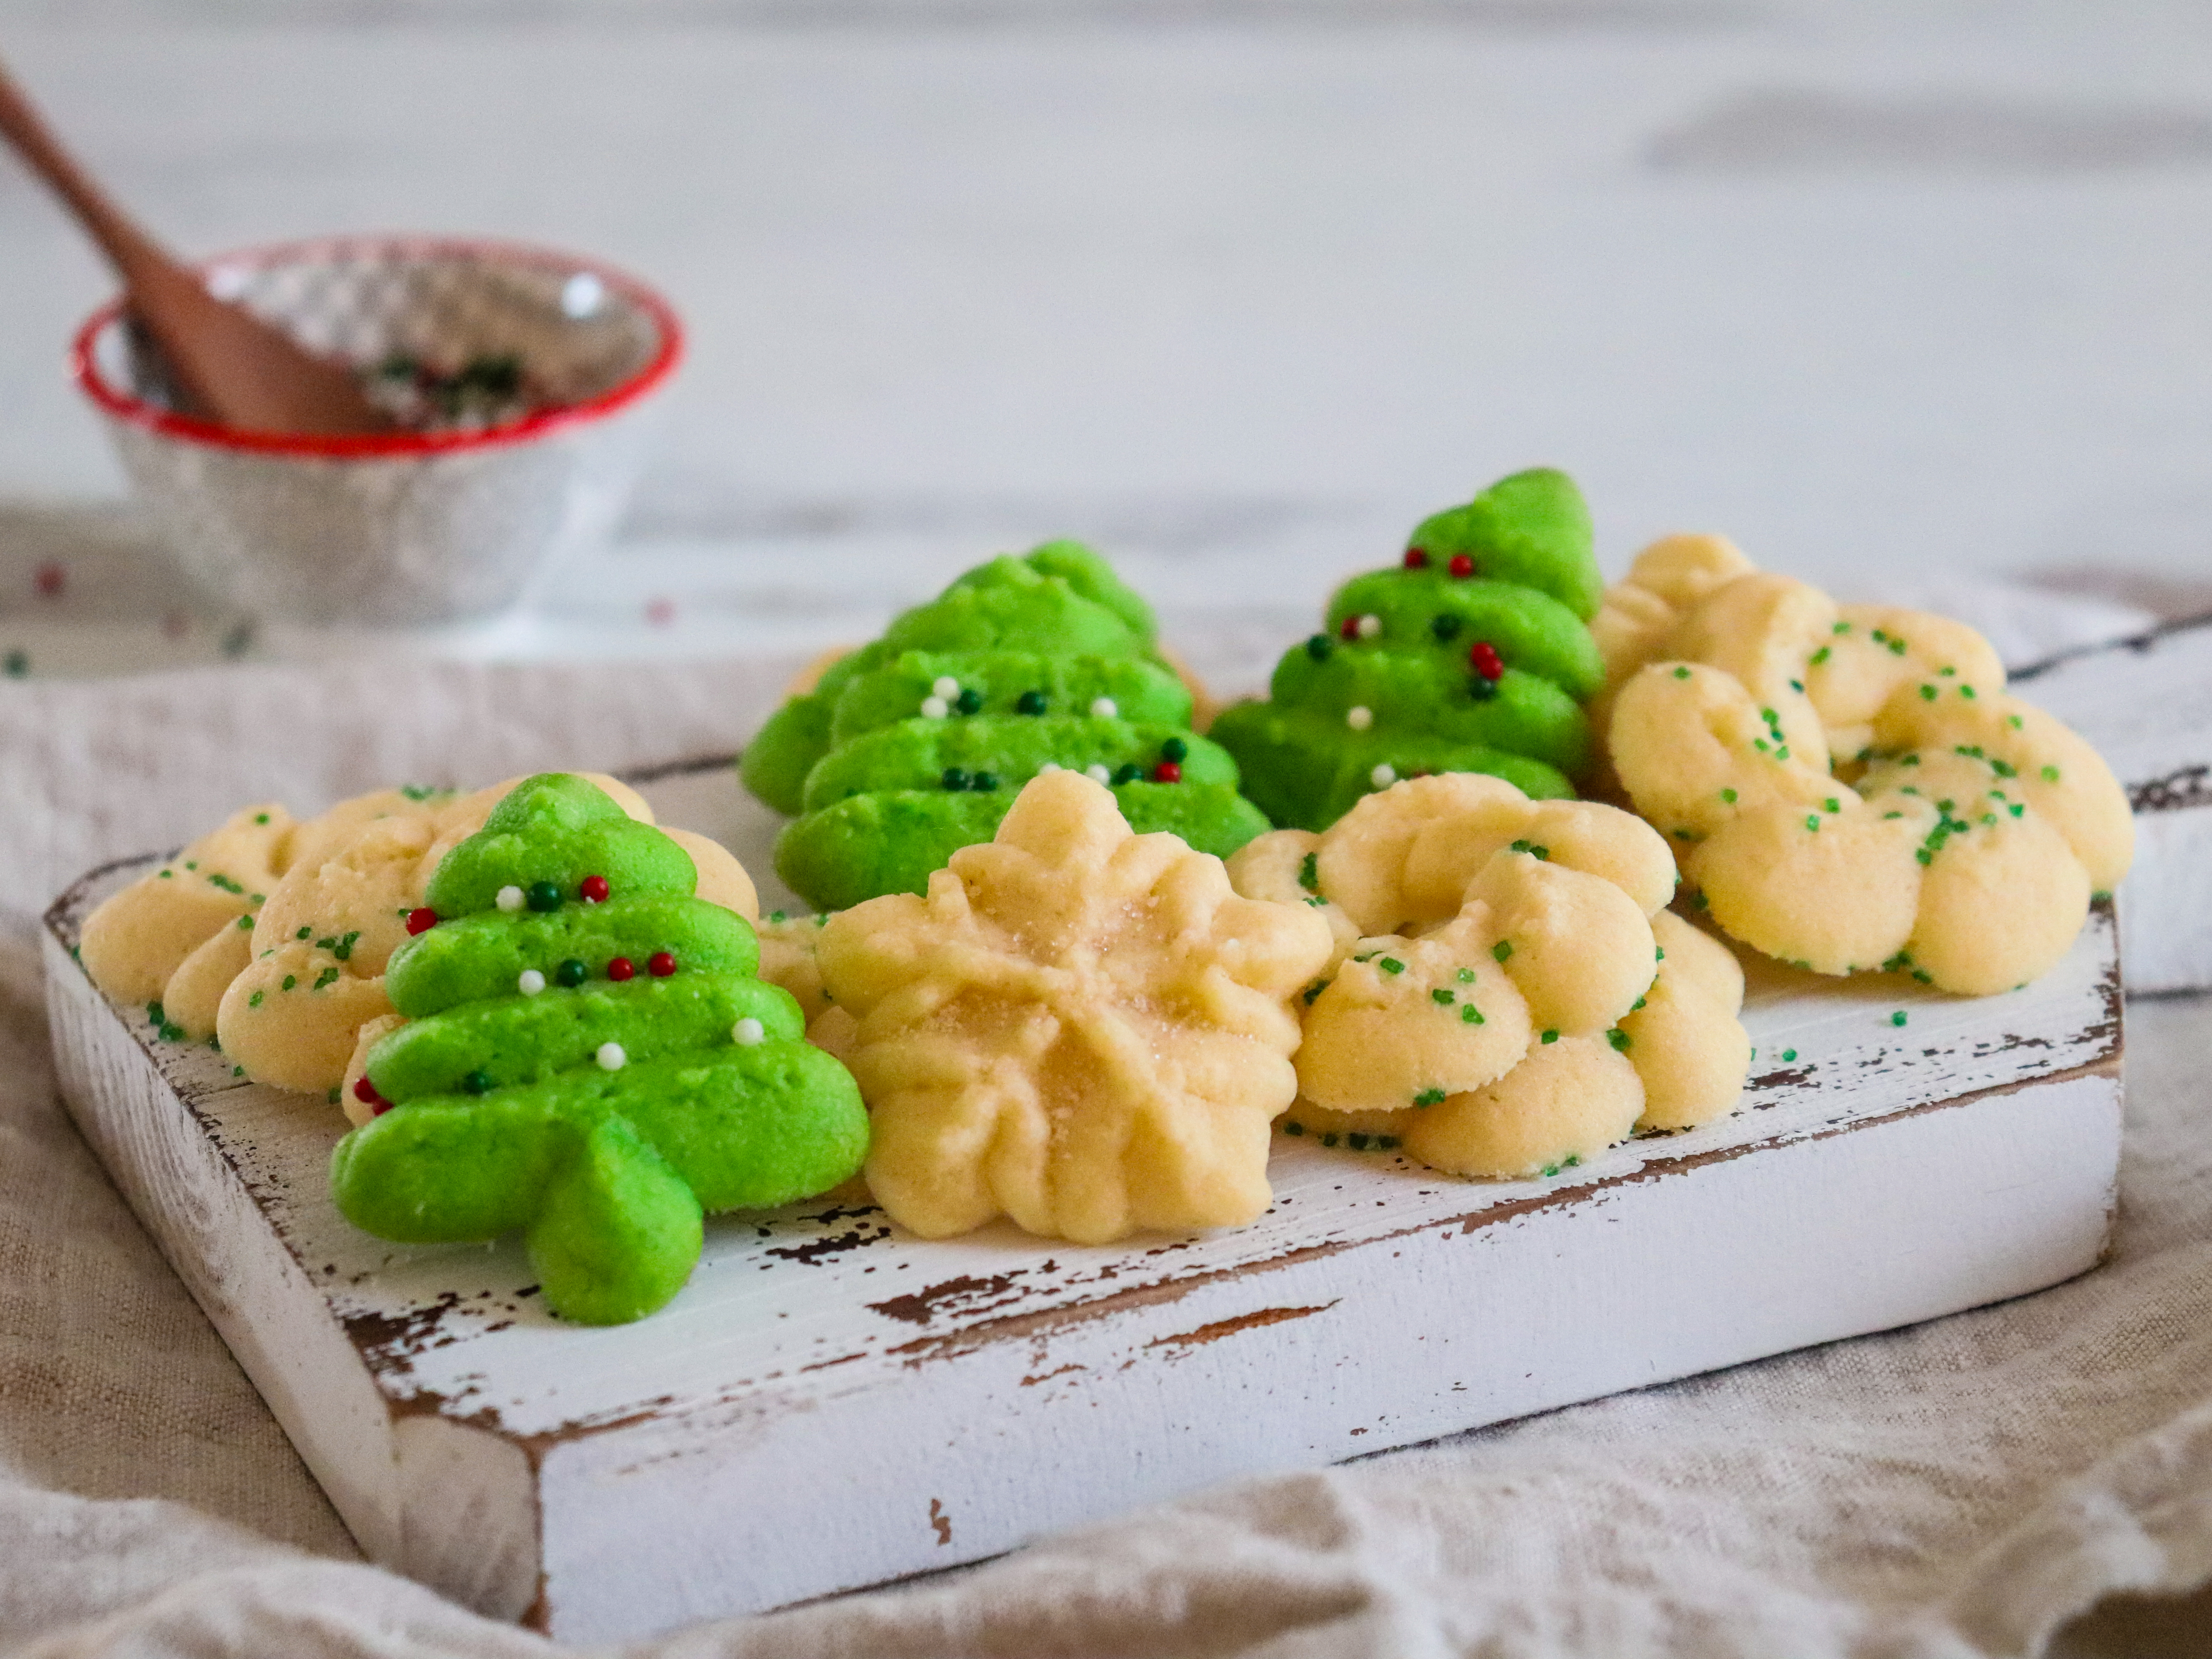
Classic spritz cookies hold a special place in the heart of many cookie enthusiasts, combining nostalgia with a touch of elegance. These delightful treats are not only a feast for the taste buds but also a visual delight, thanks to their beautifully crafted shapes made possible by a charming handheld cookie press. Each batch is…