

The very first post on my blog was my blueberry pop tart recipe. That was June 13th, 2019.
Instead of changing the photos and tweaking that post, I decided to make a new post and focus on the dough used to make pop tarts.
I don’t know about you, but I think the crust is the star of the show. Let’s face it, homemade pop tarts taste so much better than any treat you get from a box! I have improved the crust portion from my original post. I am using more butter and I added some shortening. I used pastry flour instead of all-purpose. This isn’t necessary…. both will work just fine.
Once you have the perfect dough you can add any filling you would like.
Using Butter and Shortening in Your Dough:
Shortening helps give baked goods a delicate, crumbly texture but it doesn’t have any flavor.
Butter has the best flavor, and adds light, flaky layers to the dough. The flakiness comes partially from the water content of butter that evaporates as the pie bakes and turns to steam, separating and puffing up the layers in dough. (For comparison, butter is usually about 80-85% fat, 15-20% water, whereas shortening is 100% fat.)
No matter which fat you choose, shortening or butter, always cut it into cubes and chill or even freeze it until very cold before you start making the dough. This step will make the dough easier to handle and help it become nice and flaky when baked. And if your dough gets too warm while you’re rolling it out, chill it for about 15-20 minutes before you continue.
Ingredients for dough:
2½ cups (310 grams) pastry flour
1¼ cups (280 grams) butter
¼ cup (51 grams) shortening
½ teaspoon kosher salt
1½ tablespoons (19 grams) granulated sugar
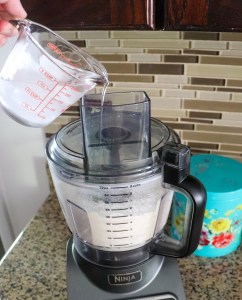
¼ cup ice water (59 grams), more if needed

Instructions for Dough:
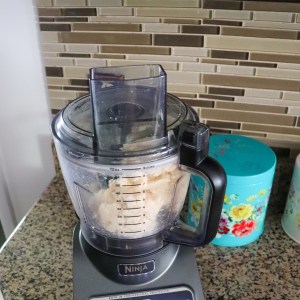
Add the flour, salt and sugar to food processor and pulse a couple of times to make sure they are mixed together.

*Next, add the cold cubed butter and shortening and pulse 10-12 times until the mixture resembles coarse crumbs and pea-sized bits.


Add ice water and pulse until dough comes together.

Remove dough from the processor and place on your work surface. Bring the dough together to form a ball and cut into two equal pieces. Form each into a 3″ x 4″ rectangle, wrap in plastic wrap and refrigerate for at least an hour.


When you are ready, remove one of the dough packs from the refrigerator. Sprinkle plenty of flour on the counter and place the dough on top. Roll the dough into a 12″ x 9″ rectangle.


Using a pizza cutter, cut the dough into pieces 3″ x 4½” rectangles.

Place dough on a baking sheet lined with parchment paper (or silicone pad).
Brush each rectangle with egg wash (large egg and 1 tablespoon cold water whisked until combined).


Now top each rectangle with a heaping tablespoon of filling and spread to the sides leaving about ½” to seal.
Remove the other disk of dough from the refrigerator, roll and cut using the same process as the first one. This is going to be the top of the pop tart.
After you have rolled and cut the dough, brush each one with the egg wash and place on top of the filled bottom piece. Press firmly around the sides to “seal” the pop tart.


Poke holes on the top with a toothpick, skewer, or fork to allow steam to escape.

Now, chill them in the refrigerator for about 20-30 minutes. You want that butter to get cold again.
Preheat oven to 375° F. while the dough is chilling.
Once the dough has chilled, place it in the oven and bake for 20-22 minutes (until golden brown). Remove from oven and allow pop tarts to cool for 5 minutes then transfer them to a cooling rack to cool completely.

At this point you can glaze your pop tarts or eat them plain😊.

*It should be noted that the friction of the food processor blades can melt the fat a bit. When using this method, it’s best to start with very cold butter and shortening.
I hope you try this flaky pastry dough the next time you make homemade pop tarts. If you do, please tag me @goodeatsbymimi. I would love to hear from you and see your photos!!