Conquer the Sourdough: Your Foolproof Beginner’s Guide (No Fancy Techniques Needed!)
So, you’ve fallen victim to the sourdough siren song. The promise of crusty exteriors, tender crumb, and that unmistakable tangy flavor has you dreaming of baking your own loaves. But then you start researching, and BAM! Autolyse, fermentolyse, tangzhong… it all sounds like a secret handshake for seasoned bakers.
Fear not, aspiring sourdough artisan! Today, we’re stripping it back. We’re going to make delicious, homemade sourdough bread with a recipe and instructions so straightforward, you can ditch the jargon and focus on the magic. No autolyse, no fermentolyse – just pure, unadulterated sourdough goodness.
This recipe is designed for success, even if your sourdough starter is still a little shy. I fed my starter yesterday morning and last night before I went to bed. When I woke up this morning, “Van Dough” (my starter’s name☺️) was ready to go!

The “No-Fuss” Sourdough Recipe for Beginners
This recipe uses a relatively high hydration, which can make it a little sticky, but it’s incredibly forgiving and leads to a fantastic crumb. Don’t be intimidated by the stickiness – we’ll tackle that!
Ingredients:
- 100g Active Sourdough Starter: This is your “mother” – bubbly, active, fed 4-12 hours prior. If your starter is sluggish, you might need to feed it a couple of times to get it lively.
- 350g Warm Water (around 80-90°F / 27-32°C): Not too hot, not too cold. Just comfortably warm to the touch.
- 500g Bread Flour: Bread flour has a higher protein content, essential for building that beautiful gluten structure.
- 10g Fine Kosher Salt: Don’t skimp on the salt; it controls fermentation and adds flavor.
Equipment You’ll Need:
- Large mixing bowl
- dough scraper or spatula
- Bench scraper
- Plastic wrap or a damp kitchen towel
- Clean kitchen towel or couche proofing cloth (if you have one)
- Banneton (proofing basket) or a bowl lined with a well-floured kitchen towel
- Dutch oven with a lid (highly recommended for best results)
- Parchment paper
- Razor blade or sharp knife for scoring

Step-by-Step Sourdough Success: Your Beginner’s Journey
Here’s how we’ll bring this loaf to life, one simple step at a time.
Step 1: The Mix – Bringing it all Together
- Combine Starter and Water: In your large mixing bowl, gently whisk together your active sourdough starter and the warm water until the starter is mostly dispersed. It doesn’t need to be perfectly smooth.
- Add Flour: Add the bread flour to the bowl.
- Mix Gently: Using your dough whisk or spatula, mix everything together until just combined. Don’t knead here! You’re just aiming to incorporate all the flour. The dough will look shaggy, uneven, and probably a little sticky. This is perfectly normal.
- Rest (The First Nap): Cover the bowl with plastic wrap or a damp kitchen towel and let it rest for 30 minutes. This short rest helps the flour start to absorb the water.


Step 2: The Salt – Flavor and Function
- Sprinkle the Salt: After the 30-minute rest, sprinkle the salt over the surface of the dough.
- Incorporate the Salt: Now, it’s time to gently work the salt in. You can do this by pinching and folding the dough in the bowl for a minute or two, or by using your wet hands to “dimple” and fold the dough over itself. The dough will feel a bit more cohesive but still sticky. Don’t worry about perfection! Cover and rest for 30 minutes.


Step 3: Stretch and Fold/Bulk Fermentation – The Slow Rise (and Strengthening) *see note for when to add inclusions, if you are doing so
This is where the magic happens! We’re going to let the dough develop flavor and strength through a series of “stretch and folds.”
- The First Stretch and Fold: Wet your hands slightly to prevent sticking. Grab one side of the dough, stretch it up gently, and fold it over to the opposite side. Rotate the bowl a quarter turn and repeat this motion 3 more times, so you’ve stretched and folded all four “sides” of the dough.
- Rest: Cover the bowl and let the dough rest for 30 minutes.
- Repeat Stretch and Folds: Repeat the stretch and fold process (Step 3.1) and the 30-minute rest (Step 3.2) a total of 3 to 4 times. You’ll notice the dough becoming smoother, more elastic, and less sticky with each set of folds. It should feel stronger and hold its shape a little better.
Bulk Fermentation Continues: After your last set of stretch and folds, cover the bowl and let the dough rest at room temperature for 3-4 hours, or until it has increased in volume by about 30-50% and looks visibly puffier and more aerated. The exact time will depend on your room temperature and starter activity. You might see a few bubbles on the surface.


Step 4: Pre-Shaping – Setting the Stage for the Loaf
- Flour Your Surface: Lightly flour your clean work surface.
- Turn Out the Dough: Gently scrape the dough out of the bowl using your dough scraper. Try to be gentle and preserve any air bubbles.
- Pre-Shape (Gentle): With lightly floured hands or your dough scraper, gently form the dough into a rough round or oval shape. The goal here is to create a little surface tension, not to perfectly shape it. Don’t overwork or deflate the dough.
- Bench Rest: Cover the dough loosely with plastic wrap or a damp towel and let it rest for 20-30 minutes. This allows the gluten to relax, making final shaping easier.


Step 5: Final Shaping – Creating Your Loaf
This is where you give your bread its final form.
- Lightly Flour: Lightly flour your surface again.
- Shape Your Loaf: Gently flip the dough over (seam-side up). Using your hands and dough scraper, shape the dough into your desired loaf shape (round is easiest for beginners, but an oval works too). The key is to create tension on the surface by gently pulling the dough towards you and tucking it under. Focus on creating a smooth, taut surface without tearing the dough.
- Prepare Your Banneton/Bowl: Generously flour your banneton or your bowl lined with a well-floured kitchen towel. Rice flour is excellent for preventing sticking.
- Transfer the Dough: Carefully place the shaped dough into the prepared banneton or bowl, seam-side up. This means the smooth, taut side will be at the bottom of your basket.
Step 6: Cold Proofing (The Overnight Chill)
This is the “set it and forget it” part that develops incredible flavor and makes the dough easier to handle.
- Cover and Refrigerate: Cover the banneton/bowl securely with plastic wrap or place the whole thing inside a large plastic bag.
- Chill Overnight: Refrigerate for 18 – 24 hours (or up to 48). This slow, cold fermentation is your friend for developing complex flavors and making the dough firm and easy to score.

Step 7: The Bake – Bringing the Heat!
-
- Preheat Your Oven & Dutch Oven: About 45 minutes to an hour before you’re ready to bake, place your Dutch oven (with the lid on) into your oven and preheat to 550°F (288°C). It’s crucial that your Dutch oven is screaming hot.
- Prepare for Baking: Once preheated, carefully remove the Dutch oven from the oven (use oven mitts!). Gently remove the lid.
- Turn Out and Score: Carefully take your dough out of the refrigerator. Place a piece of parchment paper over the top of the banneton/bowl. Place your hand underneath and invert them quickly onto the parchment paper. The dough should release easily.
- Score Your Loaf: This is where you give your bread its signature look and allow it to expand properly in the oven. Using your razor blade or sharp knife, make a swift, confident cut across the top of the dough. A simple single slash, a crescent moon, or an “X” are great for beginners. Aim to cut about ½ inch deep.
- Into the Oven: Carefully lift the parchment paper with the dough and gently lower it into the hot Dutch oven. Place the lid back on. Lower oven temperature to 475°F (246°C).
- Bake with Lid On: Bake for 30 minutes with the lid on. This traps the steam, helping your loaf rise beautifully.
- Bake with Lid Off: After 30 minutes, carefully remove the lid of the Dutch oven. The loaf should have risen significantly and started to turn a pale golden color. Lower oven temperature to 450°F (232°C).
- Continue Baking: Continue baking for another 15-25 minutes, or until the crust is a deep golden brown and the internal temperature of the bread reaches at least 205°F (96°C) when tested with an instant-read thermometer.
- Cooling is Crucial: Once baked, carefully remove the bread from the Dutch oven and place it on a wire rack to cool completely. This is the hardest part! Resist the urge to cut into it. The inside is still cooking while it cools, and cutting too early will result in a gummy texture. Let it cool for at least 1-2 hours.


*Note: The Best Time to Add Inclusions
The optimal moment to fold inclusions into sourdough is during the bulk fermentation stage, specifically after the first few sets of stretch-and-folds (or coil folds). Here’s why:
- Early in bulk fermentation (first stretch-and-fold): The dough is still developing strength, and adding inclusions too soon can disrupt gluten formation.
- Midway through bulk fermentation (after 2-3 stretch-and-folds): At this point, the dough has some structure, making it easier to gently incorporate mix-ins without deflating it too much.
- Late in bulk fermentation or during shaping: Adding inclusions too late can lead to uneven distribution and may tear the dough.
Step-by-Step Process:
- Prepare your inclusions—If using dried fruit, soak it briefly in warm water or tea to prevent it from absorbing moisture from the dough. Toast nuts or seeds for extra flavor.
- Complete the first few stretch-and-folds (or coil folds)—Allow the dough to build initial strength (about 1-2 hours into bulk fermentation).
- Add inclusions on the third fold—Spread them evenly over the dough, then fold and gently knead to distribute.
- Continue bulk fermentation—Let the dough finish fermenting before shaping.
Tips for Perfectly Folded-In Inclusions
- Don’t overmix—Be gentle to avoid degassing the dough.
- Prevent sinking—Heavier ingredients (like walnuts or chocolate chunks) may sink if added too late, so folding them in midway helps.
- Balance hydration—If adding wet ingredients (olives, roasted garlic), reduce water in the dough slightly to compensate.
- Adjust proofing time—Some inclusions (like whole grains or seeds) can slow fermentation, so bulk ferment slightly longer if needed.
What Inclusions Work Best?
- Sweet: Raisins, cranberries, chocolate chips, cinnamon swirls
- Savory: Cheese, sun-dried tomatoes, caramelized onions, fresh herbs
- Crunchy: Walnuts, pecans, flaxseeds, sesame seeds
Incorporating mix-ins into sourdough bread is all about balance—timing, technique, and the right ingredients make the difference between a good loaf and a great one. Try experimenting with different combinations and find your favorite!
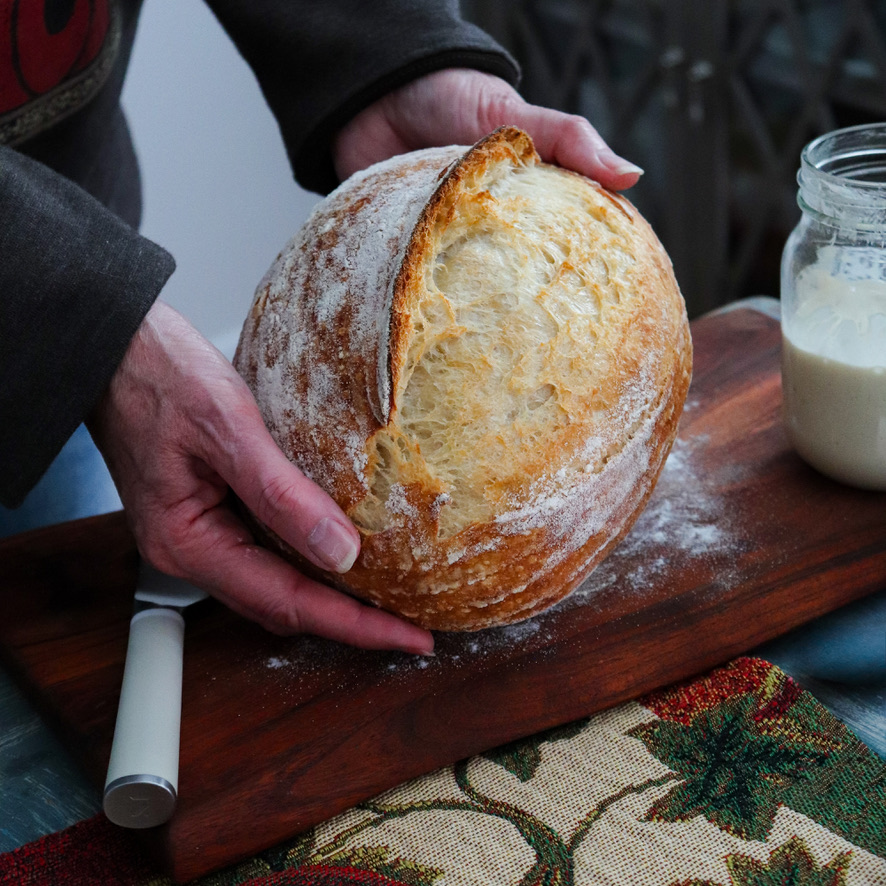
Congratulations! You’ve Baked Sourdough!
Take a moment to admire your creation. You’ve taken simple ingredients and, with a little patience and this straightforward method, transformed them into a beautiful loaf of sourdough bread.


Don’t worry if your first loaf isn’t “perfect.” Every bake is a learning experience. The more you bake, the more you’ll understand how your starter behaves, how your dough feels, and how your oven performs.
So go ahead, slice into that crusty masterpiece, savor that tangy flavor, and bask in the glory of your sourdough success. You’ve earned it!